Okay Declan, let's try making this post a short and sweet update, not a rambling Homerian epic about simple stuff.
I got a Raspberry Pi (RPi) and an RPi camera because I wanted to learn about them and mess around with them. If I could do image recognition with them, that'd be a good platform to do ML, NN, and if I got enough data, maybe even DS type stuff. Luckily, there's a ton of resources and code out there already. I drew upon heavily from www.pyimagesearch.com, which is a REALLY useful site, explained very great for beginners. Two articles that I basically copied code from and then butchered were this and this.
He's not quite doing "image recognition" in this code, it's more like "difference recognition". Very simply, he has a stream of frames coming in from the camera. He starts off by taking what will be considered a "background frame". Then, for all subsequent frames, he subtracts the background from the current frame, and then looks at the absolute difference (all done in grayscale, to make it simpler) of pixels. If two frames were identical, you'd expect very little different. If an object appeared in the new frame, the difference would show that object. Then, he uses some opencv tools to figure out where the object is, and draw a box around it.
I was able to put his code together and run it pretty quickly (though I removed some stuff like uploading it to dropbox, instead doing a kind of naive thing of sending the files via scp to my other machine), producing this gif of local traffic outside my window:
Of course, the devil is in the details. If you watch it a few times, you'll notice some weird behavior. Most obviously, boxes are detected around the objects, but then the boxes appear to remain where the object was for several frames. Here you can see it frame by frame:


Why does this happen? Well it's actually a smart feature, but done in a somewhat clumsy way. In his code, he has the following (I combined the few relevant snippets) inside the main frame capturing loop:
if avg is None:
      print("[INFO] starting background model...")
      avg = gray.copy().astype("float")
      rawCapture.truncate(0)
      continue

cv2.accumulateWeighted(gray, avg, alpha)

frameDelta = cv2.absdiff(gray, cv2.convertScaleAbs(avg))
Here, the variable gray is the (grayscale) frame we're capturing each time. The avg variable is the background I mentioned that we'll be subtracting from all following frames. So in the if statement, it's simply setting avg to be the first gray value if it hasn't been set yet. The last line is simple, too: it's the subtraction of avg from gray, each time. But the middle line is the key. The opencv function accumulateWeighted() lets you keep a running weighted average. The first argument (gray) is what you're adding to this average, the second argument (avg) is the average you'll be updating, and the last is a parameter that determines how much to weight the new addition to the average. This is actually a pretty smart feature, because if you wanted to run this all day, the lighting and other stuff would change, so eventually you'd be comparing how it looked at 6PM to how it looked at noon, and maybe even frames with no objects would get triggered. So this is an "adaptive" background, which he smartly did.
So can you see the problem? To illustrate it, here's another example of three images, where I've also plotted the avg and frameDelta images for each:


(it looks kind of crappy because I just arranged a bunch of windows rather than making it produce a grid.)
Anyway, you can probably tell what's happening. The middle column, for each example, shows avg after it's been updated with the current gray frame. The right column shows frameDelta as a result. However, you can see that in the 2nd row, in avg, there's still a "ghost" of the arm there. So when the arm is actually gone from gray, absdiff(gray,avg) will still have the arm.
So I fixed it with the following pseudocode:
for frame in cameraStream:

    frameOccupied = False

    gray = grayscaleAndOtherOps(frame)
    frameDelta = absdiff(gray,avg)

    frameOccupied = isObjectInFrame(frameDelta)

    #Do stuff with the object if there is one

    if not frameOccupied:
        cv2.accumulateWeighted(gray, avg, alpha)
Basically, you only update the average if there wasn't an object detected, because we're trying to detect differences between a current frame and a representative background frame, but a frame with an object in it isn't a typical background frame. Also, you determine if there's a difference based on the previous average, as opposed to the original code, which measured the difference based on the just-updated average (in fact, this could be why you don't see the arm detected in the top row: because it's in both gray and avg).
So that fixed it!

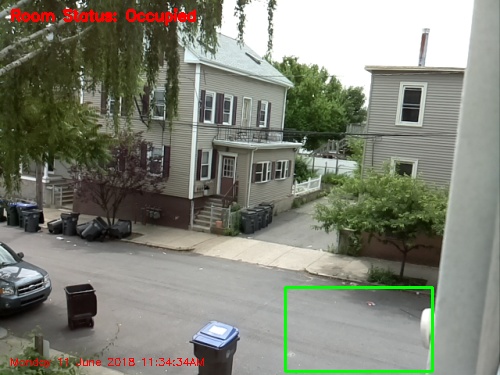
Not the best example, but you can see my elbow in the upper right of the 2nd row, and it isn't detected in the 3rd row. I actually wonder if maybe he did this on purpose, because his site is very helpful but also essentially a sales pitch for his online course. It seems like in his example gifs he doesn't have the "ghost box" problem, so either he manually cleaned those up or maybe he gives you a version of the code with lots of bugs in it for free, and the good stuff once you pay (which I don't blame him for, it's cool enough that he gives this stuff at all!).
Anyway, you might notice that the entire bottom frame gets detected for some reason, which nicely segues into the next hiccup I had to deal with. I was periodically seeing that the program was "detecting objects" that were a large part or whole of the frame.
I had a pretty good guess what this was, but had to poke around to figure it out right. What I basically did was grab a bunch of frames (all of them, not just the ones with an object being detected like I was doing before) for a couple seconds with both nothing and me waving my arms around, and then "offine" probe what was happening for those frames at each point in the processing of the image on the way to it being detected. This is actually pretty easy since at each point as the image goes from the captured frame to it being determined whether it has an object or not, it's basically a numpy array that opencv will happily display as an image.
So continuing from about where we were above, here's the code happening each loop in the camera stream:
frameDelta = cv2.absdiff(gray, cv2.convertScaleAbs(avg))
thresh = cv2.threshold(frameDelta, conf["delta_thresh"], 255, cv2.THRESH_BINARY)[1]
thresh = cv2.dilate(thresh, None, iterations=conf["dil_iters"])
cnts = cv2.findContours(thresh.copy(), cv2.RETR_EXTERNAL,cv2.CHAIN_APPROX_SIMPLE)
The first line is the one that calculates the difference between the current and avg frame. The second line then thresholds this image, where you choose a value, and all pixels below that value go to 0, and the others go to 255. I'm just using the simple binary thresholding method he used, but there are lots. So at that point, you have a completely black and white image, ideally with a few shapes that are any objects (i.e., large differences) that were detected, in white. The third line "dilates", which basically means take all connected white blobs and expand them. The "iterations" argument repeats that process a few times. Lastly, the findContours() function finds...contours. It basically finds the outlines of blobs after doing all this.
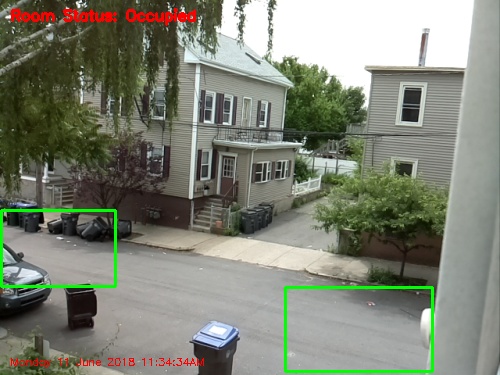
So I was pretty sure the problem was with thresholding, and lo and behold, showing the frame, frameDelta, and thresholded frames for a couple examples shows you why:

Basically, it seems like there's a weird enough lighting difference between the different frames that when it subtracted them, the threshold was way too low, and everything got on the "turn to white" side of the threshold, making the detected object the whole frame. In the third row, the average is getting mixed from past frames, so there are still some weird background lighting differences, but not for the whole frame. I'm not sure if this is cause a cloud or something passed by, but it's also possible that the camera does this itself, having auto white balance or something.
Either way, raising the threshold a bunch fixed it (sorry, it's still showing the old frames with the incorrect boxes, but the frameDelta and thresh frames are updated):

Buuuuut there's still a little problem (are you noticing a pattern here?). If you look at the thresh frame for the first row, you'll see that the thresholded value for my elbow is chopped into two pieces. We probably don't want this, because if it's like that when it goes to the findContours() step, it will detect it as two different objects. This might be a bit of a rare case because it was blurry because I was moving, but the solution is in that dilating step. So what I did was threshold pretty high, and then dilate the hell out of any remaining things, to connect them if they should probably be connected. The values I found to be good were a threshold of 45 and 20 dilation iterations. The idea is that actual objects (i.e., not weird lighting differences) will have a large difference, survive a high threshold even if they lose a lot of area (the area around their edge that isn't as much of a difference), but then the dilating should hopefully make up for some of the area and make sure the object is connected. It's not a huge deal if there's a bit of area around the object, so I'd rather overestimate it a bit.
Sweet, so let's get to the construction!
My short term plan for this is to do things like monitor traffic outside my window, and see if I can do some statistics or other stuff with it. By itself, the RPi camera is kind of just a little PCB piece, so it's not very "mount-able", to a window, for example. I wanted something that would be solid, but also easy to take off for when it rains or I want to modify something. I also wanted to be able to attach it to different things and angle the camera easily. I basically ended up going to the hardware store and spending about $10 to grab a few bracket pieces and nuts and screws, and rigged this thing together:
[gallery columns="2" size="large" ids="3771,3772,3775,3776"]
It's actually really sturdy and lets me change the angle in 2 (kind of 3?) axes! The plastic piece you see is actually a piece of glow in the dark star material, but it was kind of perfect because it's a little flexible, yet non-conducting. The back of the camera has a bunch of open circuitry that a metal piece might have shorted. I was worried because I had to widen the holes in the camera PCB a little to fit the smallest screws they had (and it had some traces very close to the holes), but I carefully did it with a sharp knife and it was fine. Here it is mounted:


The ribbon cable is quite long as you can see, but that's great for me. It's this one on Amazon.
I forgot to mention, it also sends a log of the image file name and the coordinates of the box where the object was detected, which I'll use for later stats:

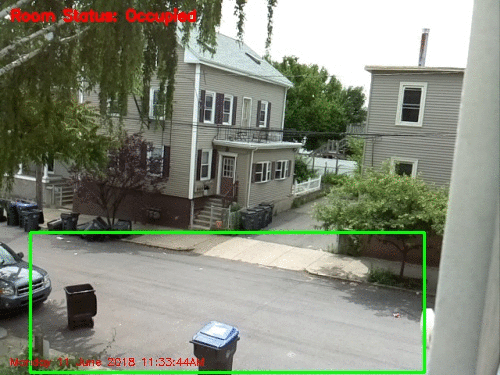
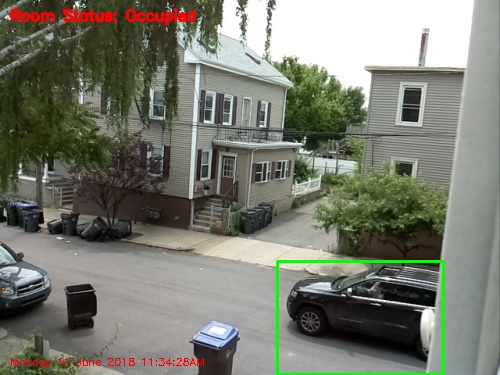
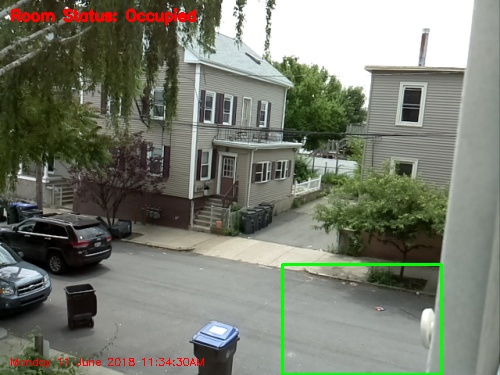
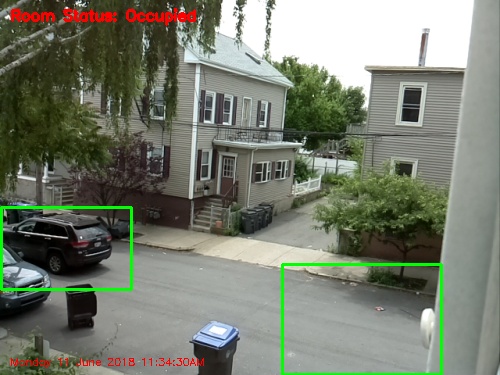
So what do we end up with, mounted in this better spot, with all the improvements?
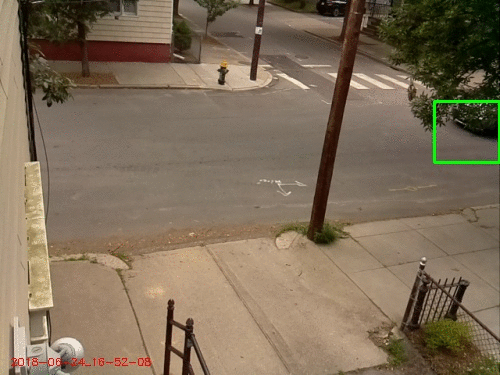
Pretty good! It's getting cars, bikes, people, etc. The lighting appears to change a lot in the roughly 5 minutes it was running, but I guess it was on and off cloudy. You can see that it's no longer having the "ghost" problem or selecting half the frame as an object.
There's a flaw with this still, though. It's hard to notice unless you know to look for it, but you might notice that almost all the cars are at the edges of the image, while slower objects like people and bikes are detected all over. This is because the frame rate should technically be 16 fps, but at this point I'm sending the file over scp to my desktop computer when the object is detected. Sending is probably slow in general, and I'm sending it in the slowest way possible (with a system call). So it's very quick to detect a present object, but slow to process it, so it really only gets the first instance of it. I'm really just doing this right now because there's limited space on the RPi and I was focusing on more important stuff, but that'll be one of the next problems I solve for sure.
So, on the docket for next time:
- Fix the sending thing to do in parallel
- Make monitoring program on other side that adds the files, etc to a CSV file to be analyzed with pandas
- Do statistics with traffic (car and human)?
- Use keras with CIFAR datasets to figure out if detected object is car, person, etc
- Attach lens to get better view of cars
- Make rain shield with PVC pipe so I can leave it out for days or weeks
There are a couple other little things on my radar that I'm aware I might have to address at some point. The threshold and dilate values I chose seem to work for a few settings (my bedroom and outside), so maybe they're robust, but it's also possible they'll freak out if the lighting changes enough. It might be smart to make something that somehow figures out the right values. Another possible bug is that, because of the thing I explained above about not adding an image to the avg if an object is detected, if an object stays in the frame for a while (for example, a parked car), the avg will never "get used to it", because it will never get added to the avg. So maybe I'll want that, but it could also be an annoying bug. I could probably fix it by just saying "if an object has been detected in the same spot for 10 frames in a row, add it to the avg".
Till next time!